Difference between revisions of "List of lonelygirl15 videos/Season 3"
From LGPedia
m |
|||
| (106 intermediate revisions by 20 users not shown) | |||
| Line 6: | Line 6: | ||
|style="width: 190px;"| | |style="width: 190px;"| | ||
|- | |- | ||
| − | |colspan="5" style="background-color: #1a4b97;"|[[Image:List of videos.jpg]] <!-- #134b9c is the real color --> | + | |colspan="5" style="background-color: #1a4b97;"|[[Image:List of videos.jpg|link=]] <!-- #134b9c is the real color --> |
|- | |- | ||
| − | |align="left" valign="top" style="width: 20px; border-left: 15px solid #1a4b97; padding: 0px;"|[[Image:Lgp lov tl corner.png]] | + | |align="left" valign="top" style="width: 20px; border-left: 15px solid #1a4b97; padding: 0px;"|[[Image:Lgp lov tl corner.png|link=]] |
| | | | ||
| − | |align="right" valign="top" style="width: 20px; padding: 0px;"|[[Image:Lgp lov tr corner.png]] | + | |align="right" valign="top" style="width: 20px; padding: 0px;"|[[Image:Lgp lov tr corner.png|link=]] |
|colspan="2" style="background-color: #1a4b97; width: 380px;"| | |colspan="2" style="background-color: #1a4b97; width: 380px;"| | ||
|- | |- | ||
| Line 20: | Line 20: | ||
{{LoVNavi|3}} | {{LoVNavi|3}} | ||
<ol start="411" style="line-height: 150%;"> | <ol start="411" style="line-height: 150%;"> | ||
| − | ===Bloodlines Aftermath=== | + | ===1. Bloodlines Aftermath=== |
<li>[[She Lost A Lot Of Blood]] {{init|Daniel}} | <li>[[She Lost A Lot Of Blood]] {{init|Daniel}} | ||
<li>[[Up All Night]] {{init|Jonas}} | <li>[[Up All Night]] {{init|Jonas}} | ||
| Line 28: | Line 28: | ||
<li>[[I Love You All]] {{init|Emma}} | <li>[[I Love You All]] {{init|Emma}} | ||
| − | ===Things Heat Up=== | + | ===2. Things Heat Up=== |
<li>[[Things Fall Apart]] {{init|Sarah}} | <li>[[Things Fall Apart]] {{init|Sarah}} | ||
<li>[[I Lost It]] {{init|Jonas}} | <li>[[I Lost It]] {{init|Jonas}} | ||
| Line 37: | Line 37: | ||
<li>[[Babe in the Woods]] {{init|Daniel}} | <li>[[Babe in the Woods]] {{init|Daniel}} | ||
| − | ===Shadowed=== | + | ===3. Shadowed=== |
<li>[[Born to Run]] {{init|Jonas}} | <li>[[Born to Run]] {{init|Jonas}} | ||
<li>[[Drawing in Bed]] {{init|Gina}} | <li>[[Drawing in Bed]] {{init|Gina}} | ||
| Line 50: | Line 50: | ||
<li>[[At the Beach]] {{init|Daniel}} | <li>[[At the Beach]] {{init|Daniel}} | ||
| − | ===Carl and Sacred Spirit=== | + | ===4. Carl and Sacred Spirit=== |
<li>[[Tangled Web]] {{init|Jennie}} | <li>[[Tangled Web]] {{init|Jennie}} | ||
| − | <li | + | <li>[[Spanish Princess]] {{init|Sarah}} |
<li value="437">[[Coffee and Donuts]] {{init|Jonas}} | <li value="437">[[Coffee and Donuts]] {{init|Jonas}} | ||
<li>[[Mexican Mating Machine]] {{init|Gina}} | <li>[[Mexican Mating Machine]] {{init|Gina}} | ||
| Line 68: | Line 68: | ||
<li>[[Fries And A Shakedown]] {{init|Sarah}} | <li>[[Fries And A Shakedown]] {{init|Sarah}} | ||
| − | ===The Hunt for Bree's Elder=== | + | ===5. The Hunt for Bree's Elder=== |
<li>[[A Stranger Calls]] {{init|Jennie}} | <li>[[A Stranger Calls]] {{init|Jennie}} | ||
<li>[[Varsity Blues]] {{init|Daniel}} | <li>[[Varsity Blues]] {{init|Daniel}} | ||
| Line 82: | Line 82: | ||
<li>[[Beach Party]] {{init|Jennie}} | <li>[[Beach Party]] {{init|Jennie}} | ||
| − | ===Jonas in London=== | + | ===6. Jonas in London=== |
<li>[[Escape to London]] {{init|Jonas}} | <li>[[Escape to London]] {{init|Jonas}} | ||
<li>[[LA To LDN]] {{init|Jonas}} | <li>[[LA To LDN]] {{init|Jonas}} | ||
| Line 90: | Line 90: | ||
<li>[[Outta Here]] {{init|Jonas}} | <li>[[Outta Here]] {{init|Jonas}} | ||
| − | ===Vote Salinas=== | + | ===7. Vote Salinas=== |
<li>[[Crazy Border Crossing!!]] {{init|Daniel}} | <li>[[Crazy Border Crossing!!]] {{init|Daniel}} | ||
<li>[[Hot Tacos]] {{init|Jonas}} | <li>[[Hot Tacos]] {{init|Jonas}} | ||
| Line 109: | Line 109: | ||
<li>[[Backyard Bikini Patrol]] {{init|Sarah}} | <li>[[Backyard Bikini Patrol]] {{init|Sarah}} | ||
| − | ===Things Get Serious=== | + | ===8. Things Get Serious=== |
<li>[[Tick Tick Boom]] {{init|Sarah}} | <li>[[Tick Tick Boom]] {{init|Sarah}} | ||
<li>[[Doing It Myself]] {{init|Emma}} | <li>[[Doing It Myself]] {{init|Emma}} | ||
| Line 118: | Line 118: | ||
<li>[[Partner Swap]] {{init|Emma}} | <li>[[Partner Swap]] {{init|Emma}} | ||
| − | ===Prom: It's to Die For=== | + | ===9. Prom: It's to Die For=== |
<li>[[Prom: It's To Die For - Part 1]] {{init|Daniel}} | <li>[[Prom: It's To Die For - Part 1]] {{init|Daniel}} | ||
<li>[[Prom: It's To Die For - Part 2]] {{init|Emma}} | <li>[[Prom: It's To Die For - Part 2]] {{init|Emma}} | ||
| Line 124: | Line 124: | ||
<li>[[Prom: It's To Die For - Part 4]] {{init|Emma}} | <li>[[Prom: It's To Die For - Part 4]] {{init|Emma}} | ||
| − | === | + | ===10. Justice For Gina=== |
<li>[[No More Fear]] {{init|Emma}} | <li>[[No More Fear]] {{init|Emma}} | ||
| + | <li>[[A Woman Scorned]] {{init|Sarah}} | ||
| + | <li>[[Undercover Lovers]] {{init|Jennie}} | ||
| + | <li>[[Evergreen Saves the Day]] {{init|Jennie}} | ||
| + | <li>[[Hangman's Noose]] {{init|Daniel}} | ||
| + | <li>[[Boy Tied Up]] {{init|Sarah}} | ||
| + | <li>[[Getting Wet]] {{init|Jonas}} | ||
| + | <li>[[Bullet to the Head]] {{init|Daniel}} | ||
| + | <li>[[Cold War Revisited]] {{init|Jennie}} | ||
| + | <li>[[Secrets in the Closet]] {{init|Emma}} | ||
| + | <li>[[Nasty Bite]] {{init|Daniel}} | ||
| + | <li>[[Words of Wisdom]] {{init|Jennie}} | ||
| + | <li>[[Playing With Fire]] {{init|Sarah}} | ||
| + | ===11. Life After Death?=== | ||
| + | <li>[[I Have A Confession]] {{init|Emma}} | ||
| + | <li>[[Breaking Up?]] {{init|Jennie}} | ||
| + | <li>[[Born Free]] {{init|Jonas}} | ||
| + | <li>[[Awkward Threesome]] {{init|Daniel}} | ||
| + | <li>[[Going Down]] {{init|Jonas}} | ||
| + | <li>[[A New Direction]] {{init|Jennie}} | ||
| + | <li>[[No Way To Live]] {{init|Jonas}} | ||
| + | |||
| + | ===12. The End is Upon Us=== | ||
| + | <li>[[Eclipse of the Heart]] {{init|Jennie}} | ||
| + | <li>[[Cooling Off]] {{init|Sarah}} | ||
| + | <li>[[Reclaim My Identity?]] {{init|Jonas}} | ||
| + | <li>[[Blood Will Flow]] {{init|Daniel}} | ||
| + | <li>[[Dangerous Injection!]] {{init|Daniel}} | ||
| + | <li>[[Rooftop Brawl]] {{init|Sarah}} | ||
| + | <li>[[Handcuffed]] {{init|Jonas}} | ||
| + | <li>[[Hidden Treasures]] {{init|Jennie}} | ||
| + | <li>[[I'm Back!!!!]] {{init|Taylor}} | ||
| + | <li>[[Shaken Up]] {{init|Sarah}} | ||
| + | <li>[[In the Closet]] {{init|Jennie}} | ||
| + | <li>[[Grave Drawings]] {{init|Jonas}} | ||
| + | <li>[[We're Screwed!]] {{init|Daniel}} | ||
| + | <li>[[Sing Before the Sun Fades]] {{init|Sonia}} | ||
| + | <li>[[Basement Captive]] {{init|Jennie}} | ||
| + | <br>[[One missed call...]] {{init|Thatfreakinrandy}} | ||
| + | <li>[[lonelygirl15 Season 3 Recap]] {{init|The Creators}} | ||
| + | <li>[[Proof of Life]] {{init|Daniel}} | ||
| + | |||
| + | ===13. The Ascension=== | ||
| + | <li>[[2:00 AM]] {{init|Sarah}} | ||
| + | <li>[[8:00 AM]] {{init|Jonas}} | ||
| + | <li>[[9:00 AM]] {{init|Jennie}} | ||
| + | <li>[[10:00 AM]] {{init|Daniel}} | ||
| + | <li>[[11:00 AM]] {{init|Jennie}} | ||
| + | <li>[[12:00 PM]] {{init|Taylor}} | ||
| + | <li>[[1:00 PM]] {{init|Daniel}} | ||
| + | <li>[[2:00 PM]] {{init|Taylor}} | ||
| + | <li>[[3:00 PM]] {{init|Taylor}} | ||
| + | <li>[[4:00 PM]] {{init|Sarah}} | ||
| + | <li>[[5:00 PM]] {{init|Taylor}} | ||
| + | <li>[[6:00 PM]] {{init|Sarah}} | ||
| + | <li>[[7:00 PM]] {{init|Sarah}} | ||
| + | <li>[[In My Sights]] {{init|Lucy}} | ||
</ol> | </ol> | ||
{{LoVNavi|3}} | {{LoVNavi|3}} | ||
| Line 140: | Line 196: | ||
############################ TOC STARTS HERE ########################### | ############################ TOC STARTS HERE ########################### | ||
#################################################################### --> | #################################################################### --> | ||
| − | *[[#Bloodlines Aftermath|Bloodlines Aftermath]] | + | *[[#1. Bloodlines Aftermath|Bloodlines Aftermath]] |
| − | *[[#Things Heat Up|Things Heat Up]] | + | *[[#2. Things Heat Up|Things Heat Up]] |
| − | *[[#Shadowed|Shadowed]] | + | *[[#3. Shadowed|Shadowed]] |
| − | *[[#Carl and Sacred Spirit|Carl and Sacred Spirit]] | + | *[[#4. Carl and Sacred Spirit|Carl and Sacred Spirit]] |
| − | *[[#The Hunt for Bree's Elder|The Hunt for Bree's Elder]] | + | *[[#5. The Hunt for Bree's Elder|The Hunt for Bree's Elder]] |
| − | *[[#Jonas In London|Jonas In London]] | + | *[[#6. Jonas In London|Jonas In London]] |
| − | *[[#Vote Salinas|Vote Salinas]] | + | *[[#7. Vote Salinas|Vote Salinas]] |
| − | *[[#Things Get Serious|Things Get Serious]] | + | *[[#8. Things Get Serious|Things Get Serious]] |
| − | *[[#Prom: It's to Die For|Prom: It's to Die For]] | + | *[[#9. Prom: It's to Die For|Prom: It's to Die For]] |
| − | *[[# | + | *[[#10. Justice for Gina|Justice for Gina]] |
| − | + | *[[#11. Life After Death?|Life After Death?]] | |
| + | *[[#12. The End is Upon Us|The End is Upon Us]] | ||
| + | *[[#13. The Ascension|The Ascension]] | ||
<!-- ################################################################### | <!-- ################################################################### | ||
############################# TOC ENDS HERE ############################ | ############################# TOC ENDS HERE ############################ | ||
| Line 160: | Line 218: | ||
#################################################################### --> | #################################################################### --> | ||
{|style="background-color: #1a4b97;" | {|style="background-color: #1a4b97;" | ||
| − | |[[Image:0420-GinaDaniel.JPG|180px]] | + | |[[Image:0420-GinaDaniel.JPG|180px|link=I've Never Done This Before]] |
|- | |- | ||
|height="12px"|<!-- spacer --> | |height="12px"|<!-- spacer --> | ||
|- | |- | ||
| − | |[[Image:Jonasjenniehottub421.JPG|180px]] | + | |[[Image:Jonasjenniehottub421.JPG|180px|link=Hot Tubbing]] |
|- | |- | ||
|height="12px"|<!-- spacer --> | |height="12px"|<!-- spacer --> | ||
|- | |- | ||
| − | |[[Image:0427-Daniel-Sarah1.jpg|180px]] | + | |[[Image:0427-Daniel-Sarah1.jpg|180px|link=Spicing Things Up]] |
|- | |- | ||
|height="12px"|<!-- spacer --> | |height="12px"|<!-- spacer --> | ||
|- | |- | ||
| − | |[[Image:0435 JennieSmart.jpg|180px]] | + | |[[Image:0435 JennieSmart.jpg|180px|link=Tangled Web]] |
|- | |- | ||
|height="12px"|<!-- spacer --> | |height="12px"|<!-- spacer --> | ||
|- | |- | ||
| − | |[[Image:0438-Carl Flowers Sarah 2.jpg|180px]] | + | |[[Image:0438-Carl Flowers Sarah 2.jpg|180px|link=Mexican Mating Machine]] |
|- | |- | ||
|height="12px"|<!-- spacer --> | |height="12px"|<!-- spacer --> | ||
|- | |- | ||
| − | |[[Image:0446-YoungGina&Bree.jpg|180px]] | + | |[[Image:0446-YoungGina&Bree.jpg|180px|link=Recovered Memory]] |
|- | |- | ||
|height="12px"|<!-- spacer --> | |height="12px"|<!-- spacer --> | ||
|- | |- | ||
| − | |[[Image:0452-GinaDaniel.jpg|180px]] | + | |[[Image:0452-GinaDaniel.jpg|180px|link=Varsity Blues]] |
|- | |- | ||
|height="12px"|<!-- spacer --> | |height="12px"|<!-- spacer --> | ||
|- | |- | ||
| − | |[[Image:0462-DrunkDaniel.jpg|180px]] | + | |[[Image:0462-DrunkDaniel.jpg|180px|link=Beach Party]] |
|- | |- | ||
|height="12px"|<!-- spacer --> | |height="12px"|<!-- spacer --> | ||
|- | |- | ||
| − | |[[Image:KM0244-Jonas.jpg|180px]] | + | |[[Image:KM0244-Jonas.jpg|180px|link=What Is She Saying?]] |
|- | |- | ||
|height="12px"|<!-- spacer --> | |height="12px"|<!-- spacer --> | ||
|- | |- | ||
| − | |[[Image:0471-RoundtheLaptop.jpg|180px]] | + | |[[Image:0471-RoundtheLaptop.jpg|180px|link=Computer Penetration]] |
|- | |- | ||
|height="12px"|<!-- spacer --> | |height="12px"|<!-- spacer --> | ||
|- | |- | ||
| − | |[[Image:0475-CarlInTheSombrero.JPG|180px]] | + | |[[Image:0475-CarlInTheSombrero.JPG|180px|link=Corn Nuts]] |
|- | |- | ||
|height="12px"|<!-- spacer --> | |height="12px"|<!-- spacer --> | ||
|- | |- | ||
| − | |[[Image:GrownUp.JPG|180px]] | + | |[[Image:GrownUp.JPG|180px|link=Girl Grown Up]] |
|- | |- | ||
|height="12px"|<!-- spacer --> | |height="12px"|<!-- spacer --> | ||
|- | |- | ||
| − | |[[Image:0493-Sarah Daniel makeout.jpg|180px]] | + | |[[Image:0493-Sarah Daniel makeout.jpg|180px|link=Prom: It's To Die For - Part 1]] |
| + | |- | ||
| + | |height="12px"|<!-- spacer --> | ||
| + | |- | ||
| + | |[[Image:Lucy the Cop.jpg|180px|link=Hangman's Noose]] | ||
| + | |- | ||
| + | |height="12px"|<!-- spacer --> | ||
| + | |- | ||
| + | |[[Image:0508-JennieWantsYou.JPG|180px|link=Words of Wisdom]] | ||
| + | |- | ||
| + | |height="12px"|<!-- spacer --> | ||
| + | |- | ||
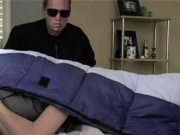
| + | |[[Image:0512-JonasOnHisWayToBunker.JPG|180px|link=Born Free]] | ||
| + | |- | ||
| + | |height="12px"|<!-- spacer --> | ||
| + | |- | ||
| + | |[[Image:0518-SarahOnBeach.JPG|180px|link=Cooling Off]] | ||
| + | |- | ||
| + | |height="12px"|<!-- spacer --> | ||
| + | |- | ||
| + | |[[Image:0526-DanielAndSarah.JPG|180px|link=Shaken Up]] | ||
| + | |- | ||
| + | |height="12px"|<!-- spacer --> | ||
| + | |- | ||
| + | |[[Image:0536-JonasOnShip.JPG|180px|link=9:00 AM]] | ||
| + | |- | ||
| + | |height="12px"|<!-- spacer --> | ||
| + | |- | ||
| + | |[[Image:0543-NadiaTheCeremonyGirl.JPG|180px|link=4:00 PM]] | ||
| + | |- | ||
| + | |height="12px"|<!-- spacer --> | ||
| + | |- | ||
| + | |[[Image:Beach Finale - Yousef.jpg|180px|link=The Ascension]] | ||
|} | |} | ||
<!-- ################################################################### | <!-- ################################################################### | ||
| Line 219: | Line 309: | ||
#################################################################### --> | #################################################################### --> | ||
{|style="background-color: #1a4b97;" | {|style="background-color: #1a4b97;" | ||
| − | |[[Image:0411-GinaEmmaInCar.jpg|180px]] | + | |[[Image:0411-GinaEmmaInCar.jpg|180px|link=She Lost A Lot Of Blood]] |
| + | |- | ||
| + | |height="12px"|<!-- spacer --> | ||
| + | |- | ||
| + | |[[Image:0419-GroceryStore.jpg|180px|link=Cat Fight!]] | ||
| + | |- | ||
| + | |height="12px"|<!-- spacer --> | ||
| + | |- | ||
| + | |[[Image:0425-Gina5.jpg|180px|link=Drawing in Bed]] | ||
| + | |- | ||
| + | |height="12px"|<!-- spacer --> | ||
| + | |- | ||
| + | |[[Image:0433-Shadow.jpg|180px|link=In the Bedroom]] | ||
| + | |- | ||
| + | |height="12px"|<!-- spacer --> | ||
| + | |- | ||
| + | |[[Image:0437-DonutNipples-none.jpg|180px|link=Coffee and Donuts]] | ||
| + | |- | ||
| + | |height="12px"|<!-- spacer --> | ||
| + | |- | ||
| + | |[[Image:0443-Bree's Mom.jpg|180px|link=Bree's Mom]] | ||
| + | |- | ||
| + | |height="12px"|<!-- spacer --> | ||
| + | |- | ||
| + | |[[Image:0450-SarahCarl.jpg|180px|link=Fries And A Shakedown]] | ||
| + | |- | ||
| + | |height="12px"|<!-- spacer --> | ||
| + | |- | ||
| + | |[[Image:453-BreesMom.jpg|180px|link=Hook Up At the Park]] | ||
| + | |- | ||
| + | |height="12px"|<!-- spacer --> | ||
| + | |- | ||
| + | |[[Image:KMLGCrossover-JonasSteve.JPG|180px|link=LA To LDN]] | ||
|- | |- | ||
|height="12px"|<!-- spacer --> | |height="12px"|<!-- spacer --> | ||
|- | |- | ||
| − | |[[Image: | + | |[[Image:0470-TaagLaughing.jpg|180px|link=Hot Tacos]] |
|- | |- | ||
|height="12px"|<!-- spacer --> | |height="12px"|<!-- spacer --> | ||
|- | |- | ||
| − | |[[Image: | + | |[[Image:0472-Taag.jpg|180px|link=Politics Gone Wild!]] |
|- | |- | ||
|height="12px"|<!-- spacer --> | |height="12px"|<!-- spacer --> | ||
|- | |- | ||
| − | |[[Image: | + | |[[Image:0477-Jennie in office.jpg|180px|link=Satan's HQ]] |
|- | |- | ||
|height="12px"|<!-- spacer --> | |height="12px"|<!-- spacer --> | ||
|- | |- | ||
| − | |[[Image: | + | |[[Image:481-GinaWithIpod.jpg|180px|link=Booby Trap?]] |
|- | |- | ||
|height="12px"|<!-- spacer --> | |height="12px"|<!-- spacer --> | ||
|- | |- | ||
| − | |[[Image: | + | |[[Image:LG486-Comeandgetit.jpg|180px|link=Tick Tick Boom]] |
|- | |- | ||
|height="12px"|<!-- spacer --> | |height="12px"|<!-- spacer --> | ||
|- | |- | ||
| − | |[[Image: | + | |[[Image:0495-Gina dead.jpg|180px|link=Prom: It's To Die For - Part 4]] |
|- | |- | ||
|height="12px"|<!-- spacer --> | |height="12px"|<!-- spacer --> | ||
|- | |- | ||
| − | |[[Image: | + | |[[Image:0504-CarlGunToHead2.JPG|180px|link=Bullet to the Head]] |
|- | |- | ||
|height="12px"|<!-- spacer --> | |height="12px"|<!-- spacer --> | ||
|- | |- | ||
| − | |[[Image: | + | |[[Image:0507-GinaClosetDrawing.JPG|180px|link=Nasty Bite]] |
|- | |- | ||
|height="12px"|<!-- spacer --> | |height="12px"|<!-- spacer --> | ||
|- | |- | ||
| − | |[[Image: | + | |[[Image:0516-HoodedFigure.JPG|180px|link=No Way To Live]] |
|- | |- | ||
|height="12px"|<!-- spacer --> | |height="12px"|<!-- spacer --> | ||
|- | |- | ||
| − | |[[Image: | + | |[[Image:0521-LucyInjection.JPG|180px|link=Dangerous Injection!]] |
|- | |- | ||
|height="12px"|<!-- spacer --> | |height="12px"|<!-- spacer --> | ||
|- | |- | ||
| − | |[[Image: | + | |[[Image:0528-JonasInCemetery.JPG|180px|link=Grave Drawings]] |
|- | |- | ||
|height="12px"|<!-- spacer --> | |height="12px"|<!-- spacer --> | ||
|- | |- | ||
| − | |[[Image: | + | |[[Image:SSHathor-top.jpg|180px|link=8:00 AM]] |
|- | |- | ||
|height="12px"|<!-- spacer --> | |height="12px"|<!-- spacer --> | ||
|- | |- | ||
| − | |[[Image: | + | |[[Image:0541-SpencerBecomingSterile.JPG|180px|link=2:00 PM]] |
|- | |- | ||
|height="12px"|<!-- spacer --> | |height="12px"|<!-- spacer --> | ||
|- | |- | ||
| − | |[[Image: | + | |[[Image:0547-LucyIsAlwaysWatching.JPG|180px|link=In My Sights]] |
|} | |} | ||
<!-- ################################################################### | <!-- ################################################################### | ||
| Line 281: | Line 403: | ||
#################################################################### --> | #################################################################### --> | ||
|- | |- | ||
| − | |align="left" valign="bottom" style="width: 20px; border-left: 15px solid #1a4b97; border-bottom: 15px solid #1a4b97; padding: 0px;"|[[Image:Lgp lov bl corner.png]] | + | |align="left" valign="bottom" style="width: 20px; border-left: 15px solid #1a4b97; border-bottom: 15px solid #1a4b97; padding: 0px;"|[[Image:Lgp lov bl corner.png|link=]] |
|style="border-bottom: 15px solid #1a4b97;"| | |style="border-bottom: 15px solid #1a4b97;"| | ||
| − | |align="right" valign="bottom" style="width: 20px; border-bottom: 15px solid #1a4b97; padding: 0px;"|[[Image:Lgp lov br corner.png]] | + | |align="right" valign="bottom" style="width: 20px; border-bottom: 15px solid #1a4b97; padding: 0px;"|[[Image:Lgp lov br corner.png|link=]] |
|colspan="2" style="border-bottom: 15px solid #1a4b97; background-color: #1a4b97;"| | |colspan="2" style="border-bottom: 15px solid #1a4b97; background-color: #1a4b97;"| | ||
|} | |} | ||